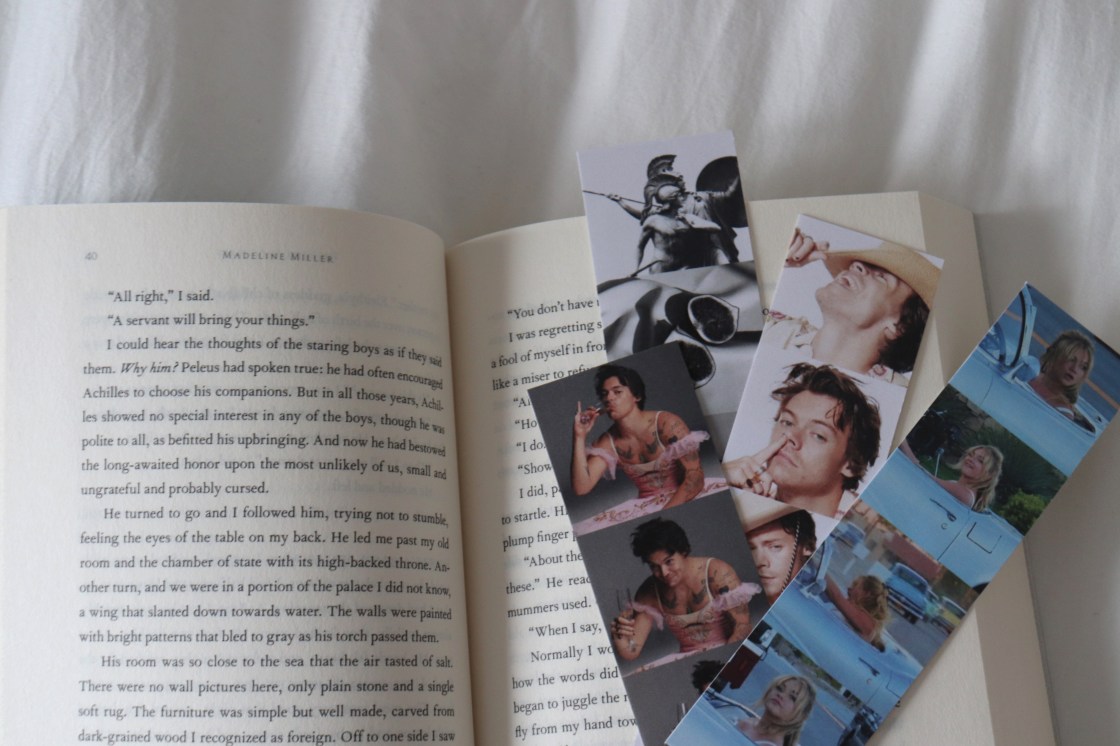
Sure, a hair tie works just as good at marking a page but photo strip bookmarks are so much cooler
I have a confession to make. When it comes to reading, I possess a terrible toxic trait: I start a book, read a few chapters, lose interest and then start another one. This doesn’t always happen, especially if I’m completely gripped by a book—I’m talking in a total chokehold where I can’t even put the book down I’m so whipped. But when it does, I’m often left with a stack of ‘to be finished’ novels judging me as I crack open another brand new book that’s going to inevitably join the pile.
So it shouldn’t come as much of a surprise when I say that I often run out of bookmarks. As a result, I’m constantly resorting to sticky notes, hair ties and any other small objects I have around me at the time to mark my page. Sure, they all get the job done but what happens when I’ve run out of sticky notes or I really need that hair tie? I decided not to answer that question and instead point myself in the direction of old-fashion bookmarks.
But instead of buying a set off of Amazon or Indigo, I made my own for two reasons: 1) it would be cheaper to DIY them myself and 2) I can customize them to my exact liking. And what I’ve really been liking are bookmarks that look as if they were printed out of a vintage photo booth. It’s a popular trend on Pinterest I wanted to recreate that typically features a celebrity, like a member of a band or a famous actor. Once I realized how simple they actually were to make, I knew I had to share the DIY. So without further ado, let’s get into it.
Here’s what you’ll need for the project:
- Blank printer paper
- Double-sided tape
- Cardstock paper
- Paper trimmer
- Scissors
The Steps:
Before all else, I recommend hopping on Pinterest and gathering all the images you want to include on your bookmark. Do you want your bookmark to be reflective of your favourite artist? Film? Novel? These are questions you can answer by simply digging around the internet. For my bookmarks, I went with Harry Styles (his SNL ballet photoshoot is my favourite so that was an easy pick!), Florence Pugh and The Song of Achilles by Madeline Miller.
Once you have all your photos ready, it’s time to design the bookmarks. I like to use the graphic design platform Canva because it’s really simple to navigate and offers hundreds of free templates to customize. (This is not a sponsored post, but @Canva let’s talk.) But of course, you can create your bookmarks with whichever design software you’d prefer. Using Canva, I started with a blank bookmark template that’s two-inches wide by six-inches long.

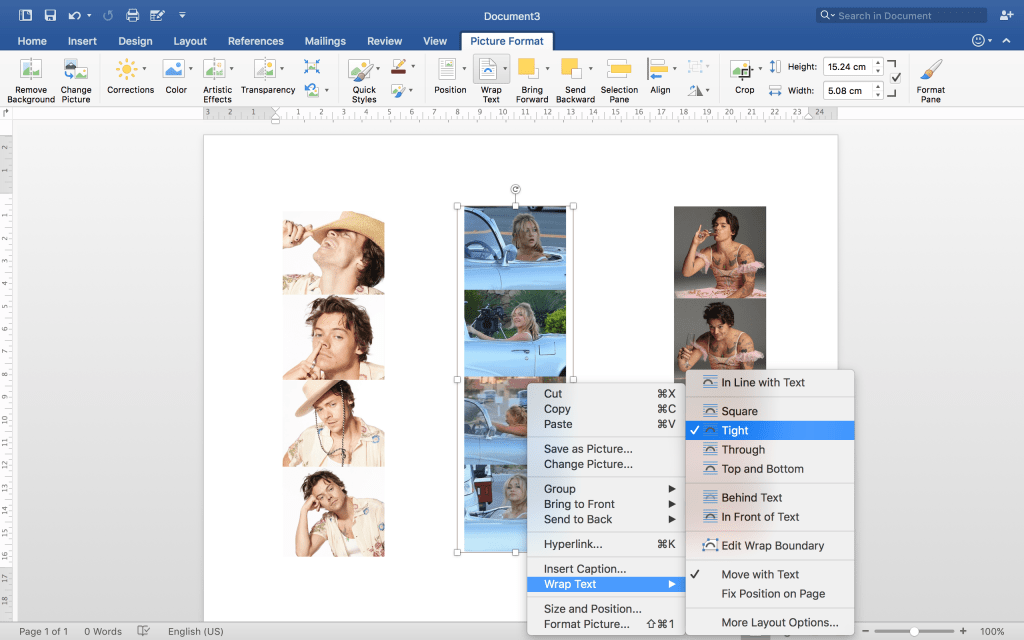
Since the inspiration for these bookmarks was the photo strips you get from a photo booth, I wanted to follow the simple design of four photos stacked vertically. Fortunately, the two-inch by six-inch dimension was perfect for four relatively equal-sized images. You may have to play around with the sizing of your photos to get them all to fit in the space but it’s definitely doable. You’ll notice in the picture below that the photos of Harry Styles on the left are noticeably longer than those placed in the bookmark template on the right. This is because I cropped the images so that they’re all the same dimensions and fit within the parameters.

When you’re happy with the design of your bookmarks, go ahead and print them out. There’s no option to print directly from Canva so what I like to do is save each bookmark individually as a PNG. Next, I create a black Microsoft Word document and change the orientation of the page from portrait to landscape—doing so allows you to print multiple bookmarks on the same page. The same instructions apply if you’re using Google Docs.
Be sure to leave a few inches between each bookmark so that it’s easier to cut them out later, especially if you have access to a paper trimmer. The simplest way to space out the bookmarks is to change the wrap text on the images to ‘Tight’ which allows you to move them around freely and leave enough white space.
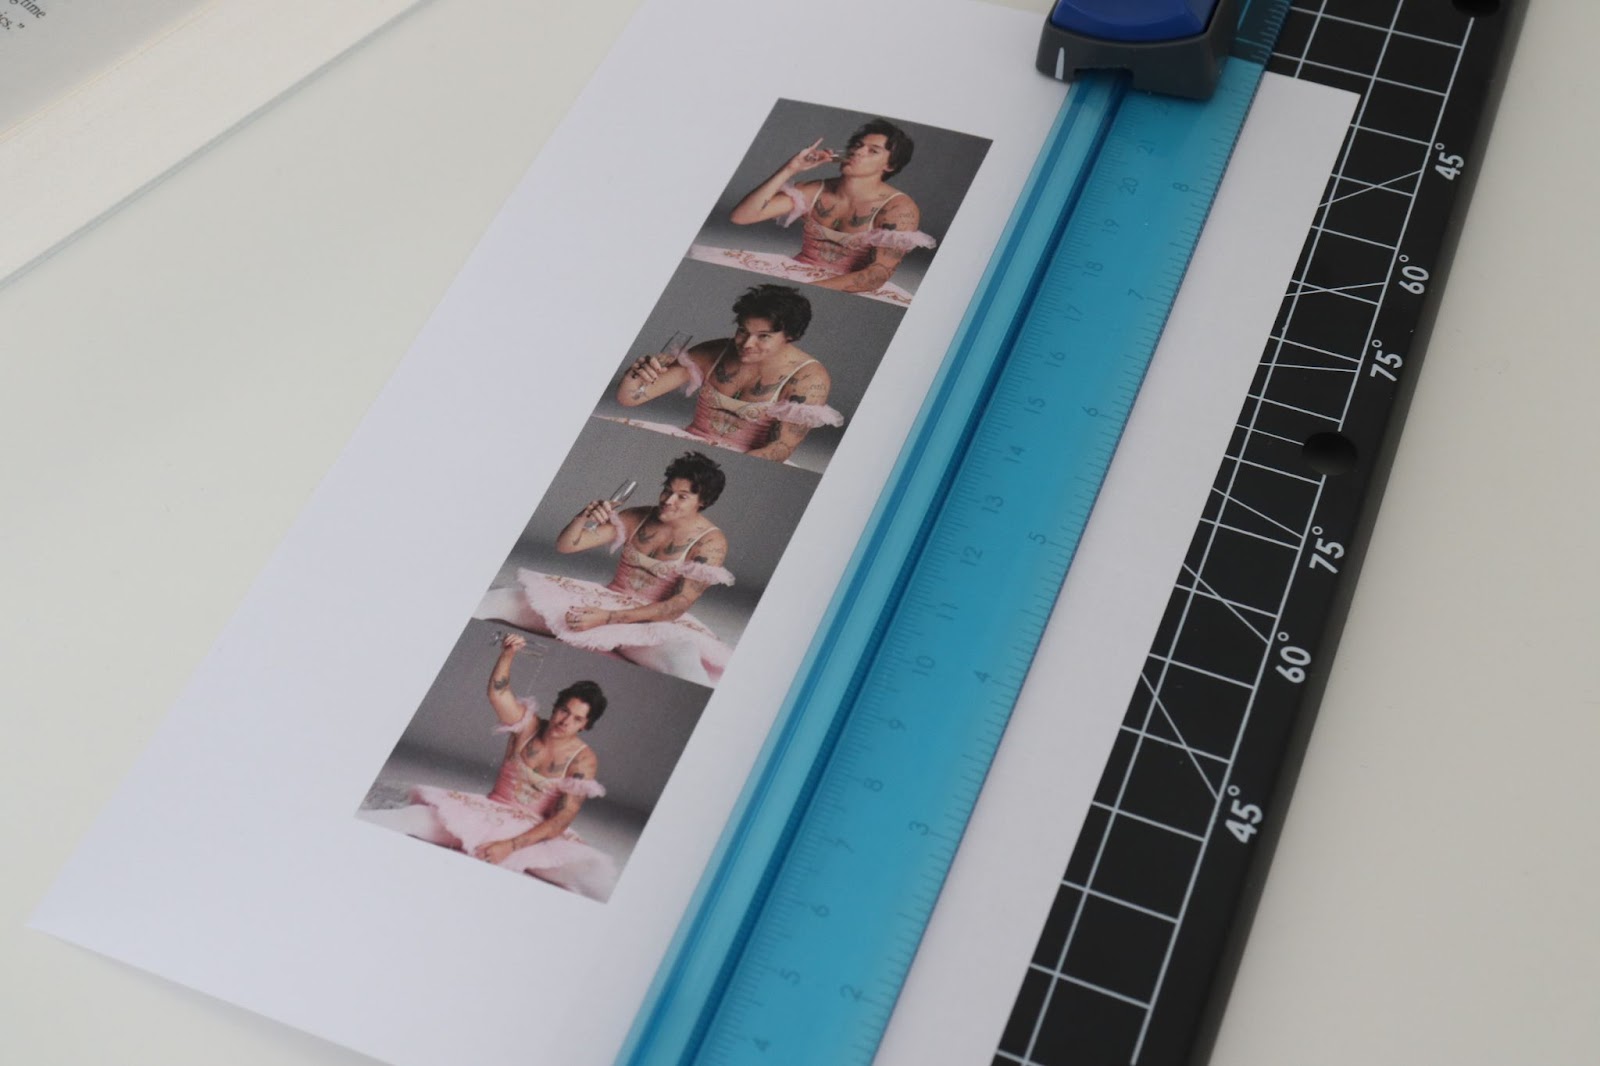
I printed my bookmarks on blank white paper. My printer was having some technical difficulties—don’t they all on those days you really need them to work 🙄—so I had to print each of the bookmarks out on their own separate sheets of paper. The unused parts of the papers will be used for other projects so they won’t go to waste.

After they’ve all been printed, the hard part begins: cutting out the bookmarks. I’ll be honest with you, using a paper trimmer will make this step much easier than cutting them out with a pair of scissors by hand. If you don’t have access to a trimmer, my advice when using scissors is to just go slow and try your best. At the end of the day, these are your bookmarks so who cares if they’re a little lopsided.
Once you’ve cut out the bookmarks you’ll quickly notice that they’re super flimsy and don’t do too great of a job at marking your last read page in a novel. This is where the cardstock paper comes in and boy does it make all the difference. To adhere the bookmark to the cardstock, I recommend double-sided tape. But a glue stick will also work.
Since I’m using a roll of double-sided tape, I apply strips at the top and bottom of the bookmark and cut off any access that hangs over. Then I move on to the sides and fill in the gaps to create a rectangle along the outer edge of the bookmark. I firmly press down on each strip of tape before removing the plastic liner to expose the adhesive side that will stick to the cardstock.

When you’re ready to place the paper onto the cardstock, I suggest lining up the bookmark to one of the cardstock’s four corners. This way, the edge of the paper is flush with the edge of the cardstock. From my experience, this is the best way to adhere the two together so that when you cut out the new, thicker bookmark, you only have to cut along one side and the bottom.
And that’s it. Pretty simple, right?
Be sure to take your time with this last step and don’t put too much pressure on yourself to make them exceptionally perfect. Believe me, my bookmarks are far from flawless but I love that they’re each uniquely imperfect!

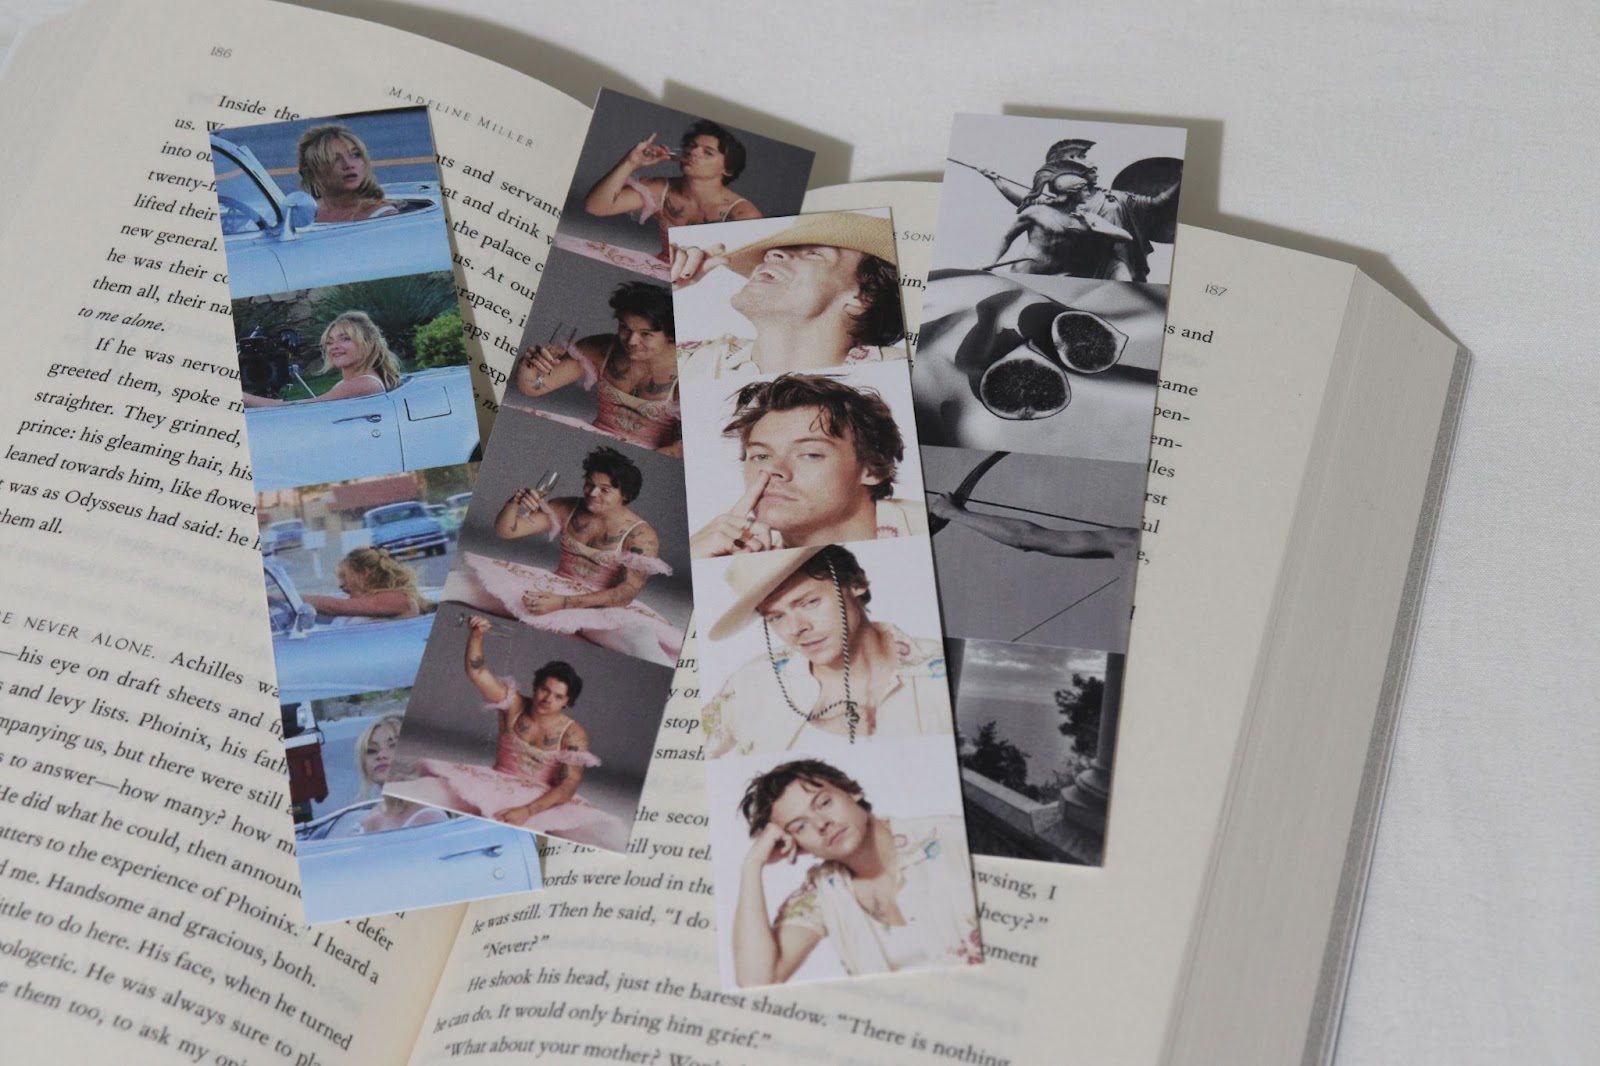
Okay seriously, how cool are these bookmarks? I think my favourite is the collage of The Song of Achilles but that could simply boil down to the fact that I’m obsessed with that book (expect a review out shortly 😉). I really hope you give them a try and make one of these bad boys for yourself or the bookworm in your life. I’d love to see your wonderful versions so be sure to tag @paper.and.lore on Instagram to be featured in our stories!
Want to see this DIY in action? Check out our TikTok Tutorial
Happy DIYing!
