Giving yourself a fresh start isn’t always easy but it sure is worth it
Here’s a brief recap of my bedroom facelift for those of you who haven’t read part one: I decided that my teenage room needed a modern upgrade but the facelift went beyond just painting my baby blue walls a creamy white—it needed an entire overhaul. So on an impromptu decision, I rearranged my furniture until I found the perfect layout that made my constricted 10-foot by 12-foot room feel much more spacious. But I hit a few roadblocks along the way. One major issue being that the digital mockup I created of what I wanted to achieve wasn’t going to work out exactly as I anticipated.
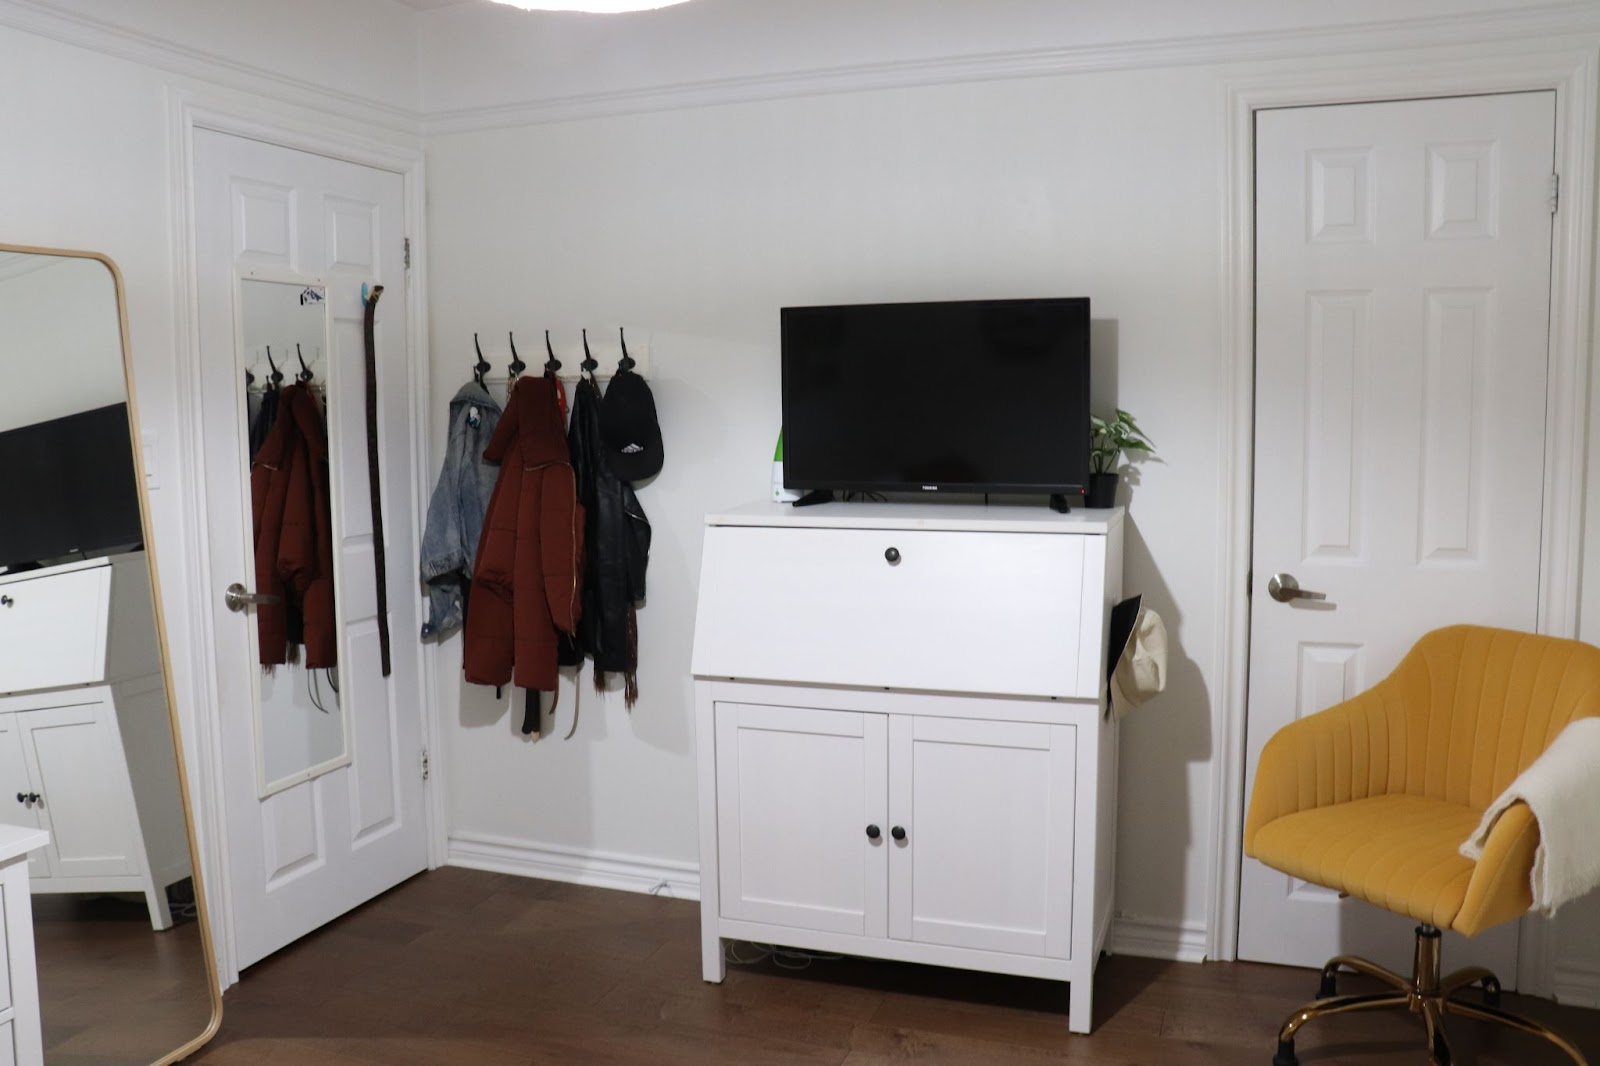
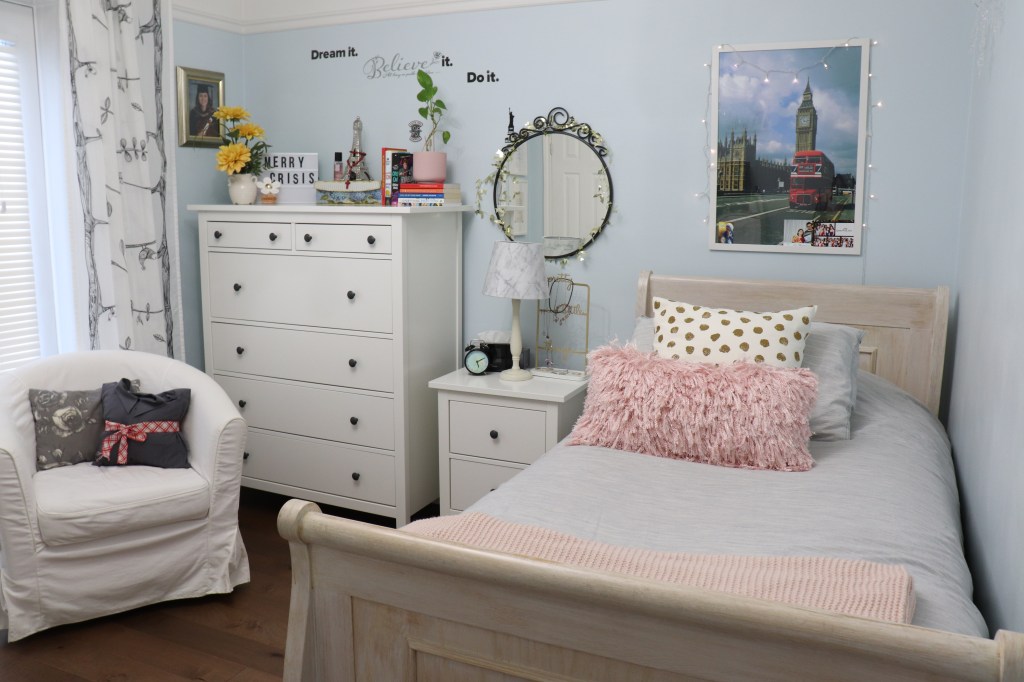
For starters, I planned on moving my secretary desk to the corner of my room between my completely free wall and adjacent french doors that lead out to the backyard—my tiny quarters decided otherwise. My only option was to keep all my furniture in the positioning my mother and I had set up: my tall dresser pushed up against the French doors, my bed rotated against the adjacent free wall and my nightstand moved to the right side of my bed where the footboard once stood.
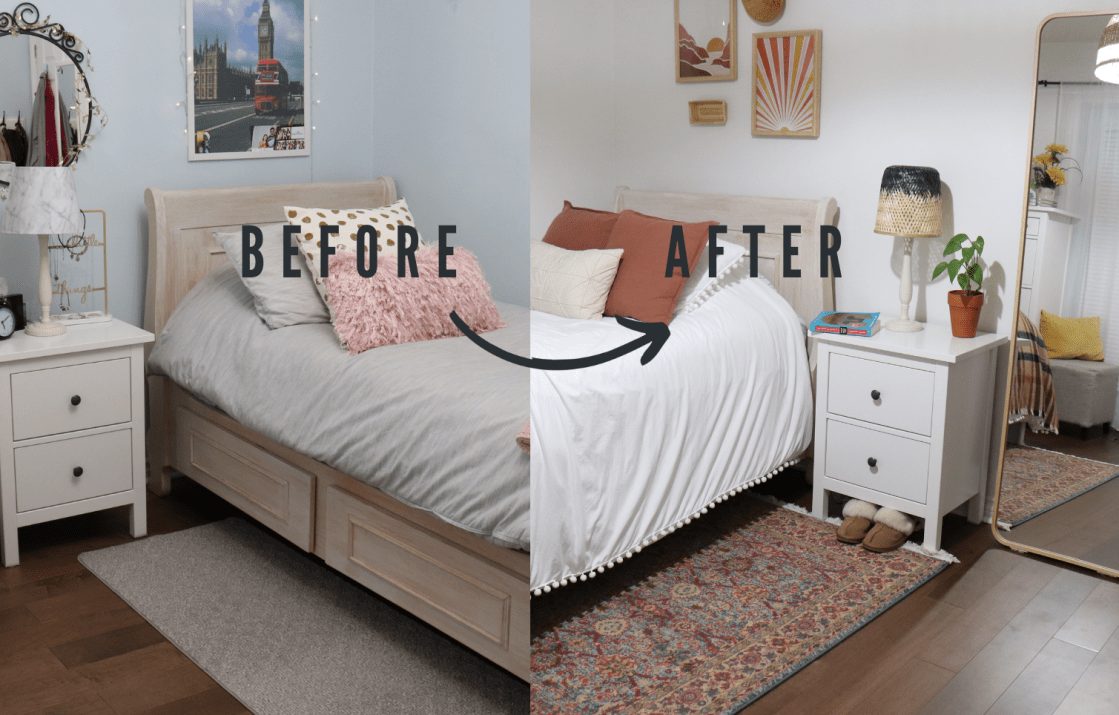
It was definitely a disappointment but my mother offered a great solution. If I took off the footboard of my sleigh bed, I would gain a few extra inches in between the end of my bed and my dresser. It wouldn’t be enough room to squeeze my desk into the space but it would do a number on making my room look more spacious and less cramped.
I eventually got my father on board with the idea too but it took some convincing. My dad had built the heavy oak bed for me with only his two hands when I was a toddler outgrowing her crib. We both had an attachment to it over the years which made this decision a hard one for him more so than me because it was his own skilled craftsmanship that would have to be modified. Thankfully, he was a champ and agreed to design a new footboard which he ended up building out of an old kitchen table. It was such a clever way to reuse the material we were going to otherwise scrap.
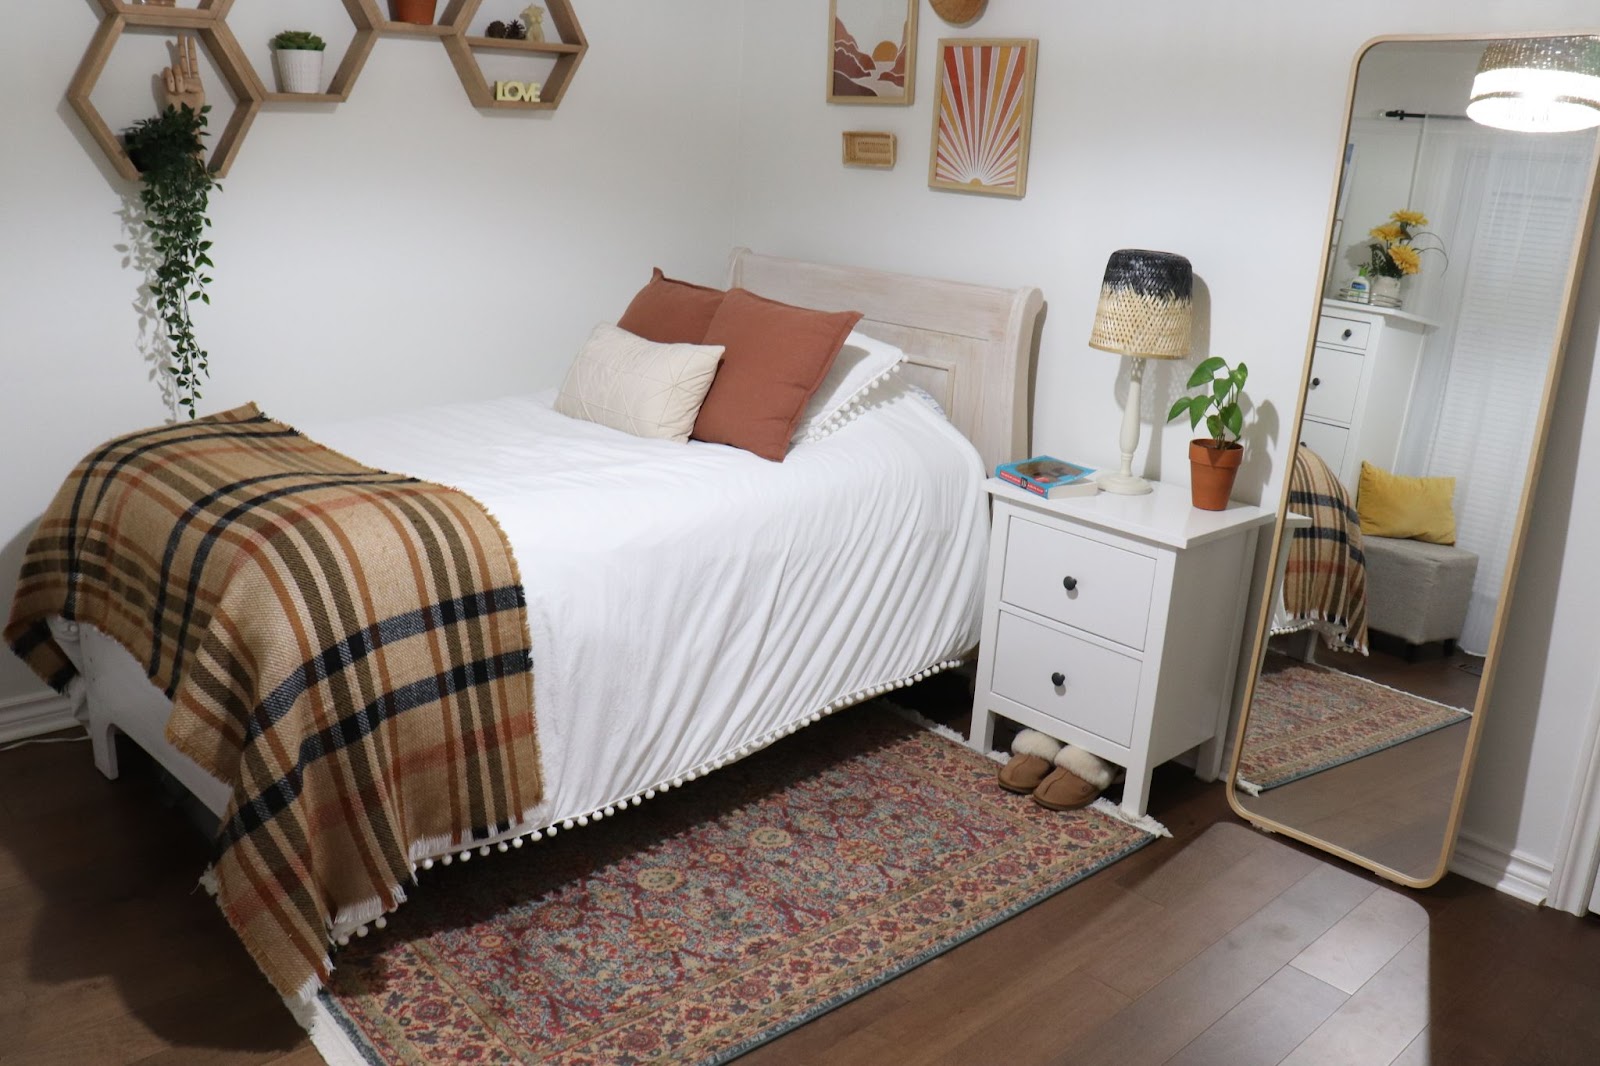
Take a look at the difference removing my bulking footboard made! I love that I can now drape my comforter over the end instead of tucking it in along the endboard. Long gone are the days of having to contort myself just to reach my clothing. Now I can access my drawers with ease, which I’m so happy about.
It’s all about decor
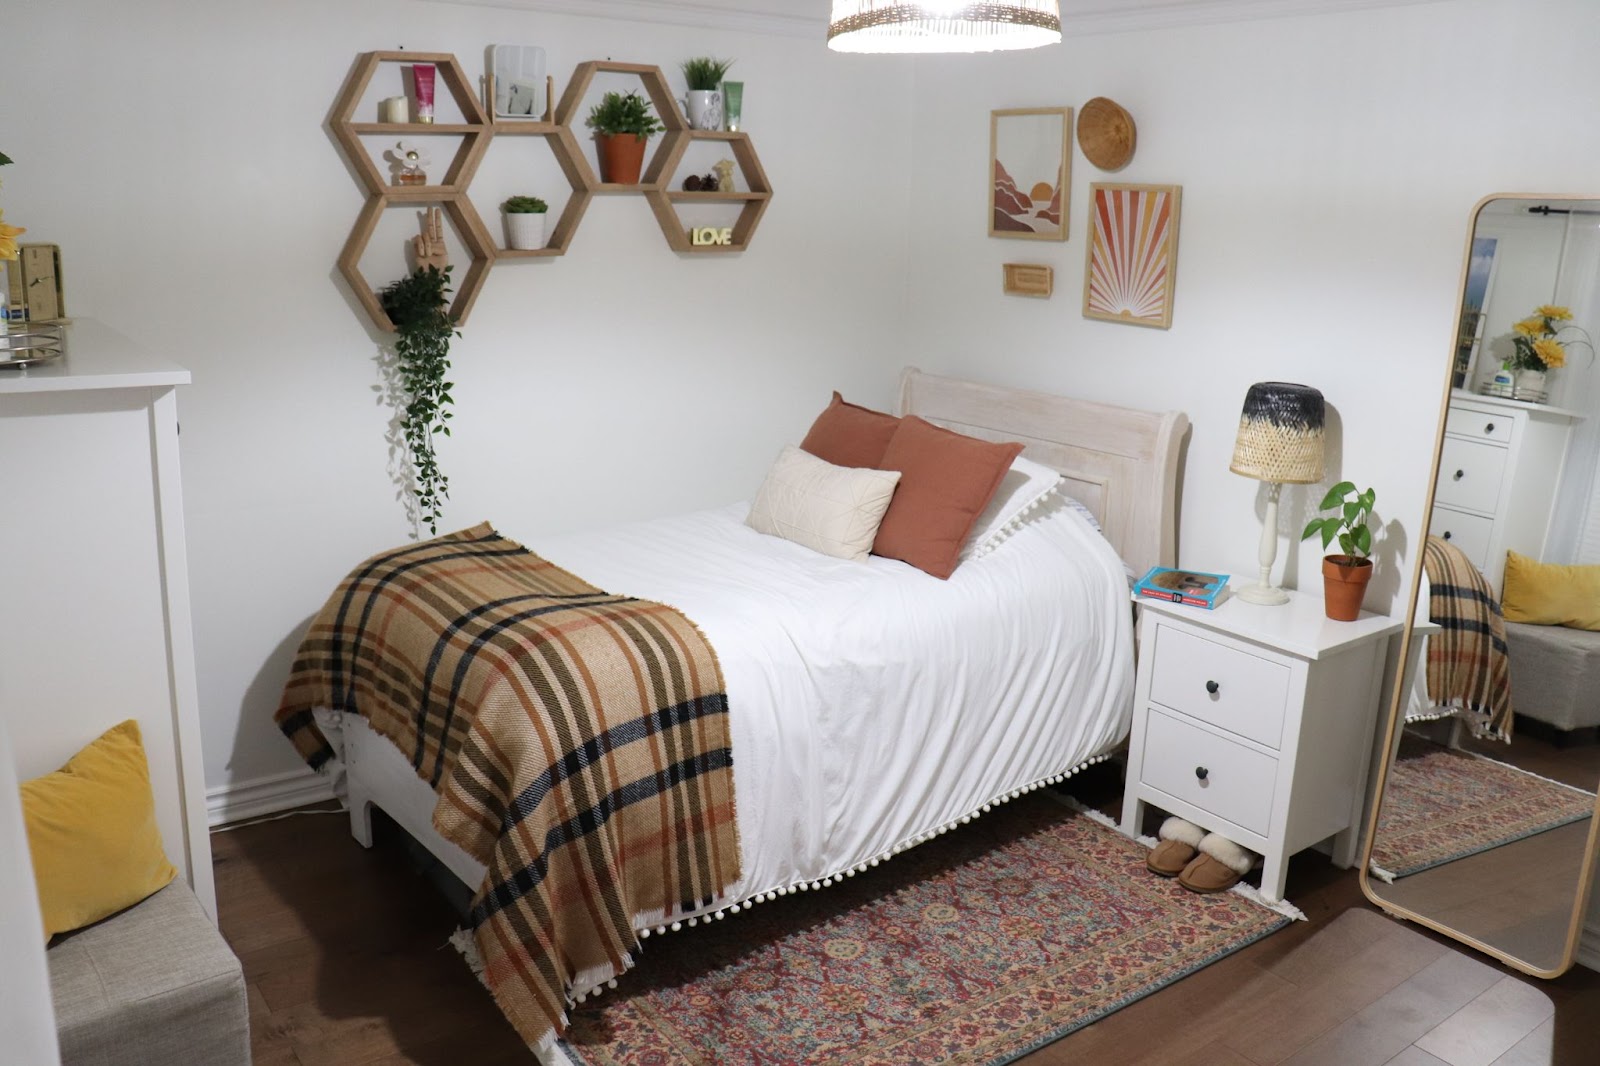
With all my dilemmas in the rearview mirror, it was finally time for the next phase (and my absolute favourite part!) of the makeover: decor. This was where I could really have fun and explore different textures, patterns and colours. To begin, I got my hands on all the items I knew I absolutely wanted in my room—the wicker pendant lighting, full-length mirror and faux plants.

As my dad likes to say: I let my fingers do the walking and turned to online shopping to find decor that was closest to what I envisioned for my space, and more importantly, within my budget. After a few weeks of debating styles and hues, I snatched the majority of my furnishing from four retail stores: IKEA, Amazon, Wayfair and Winners.
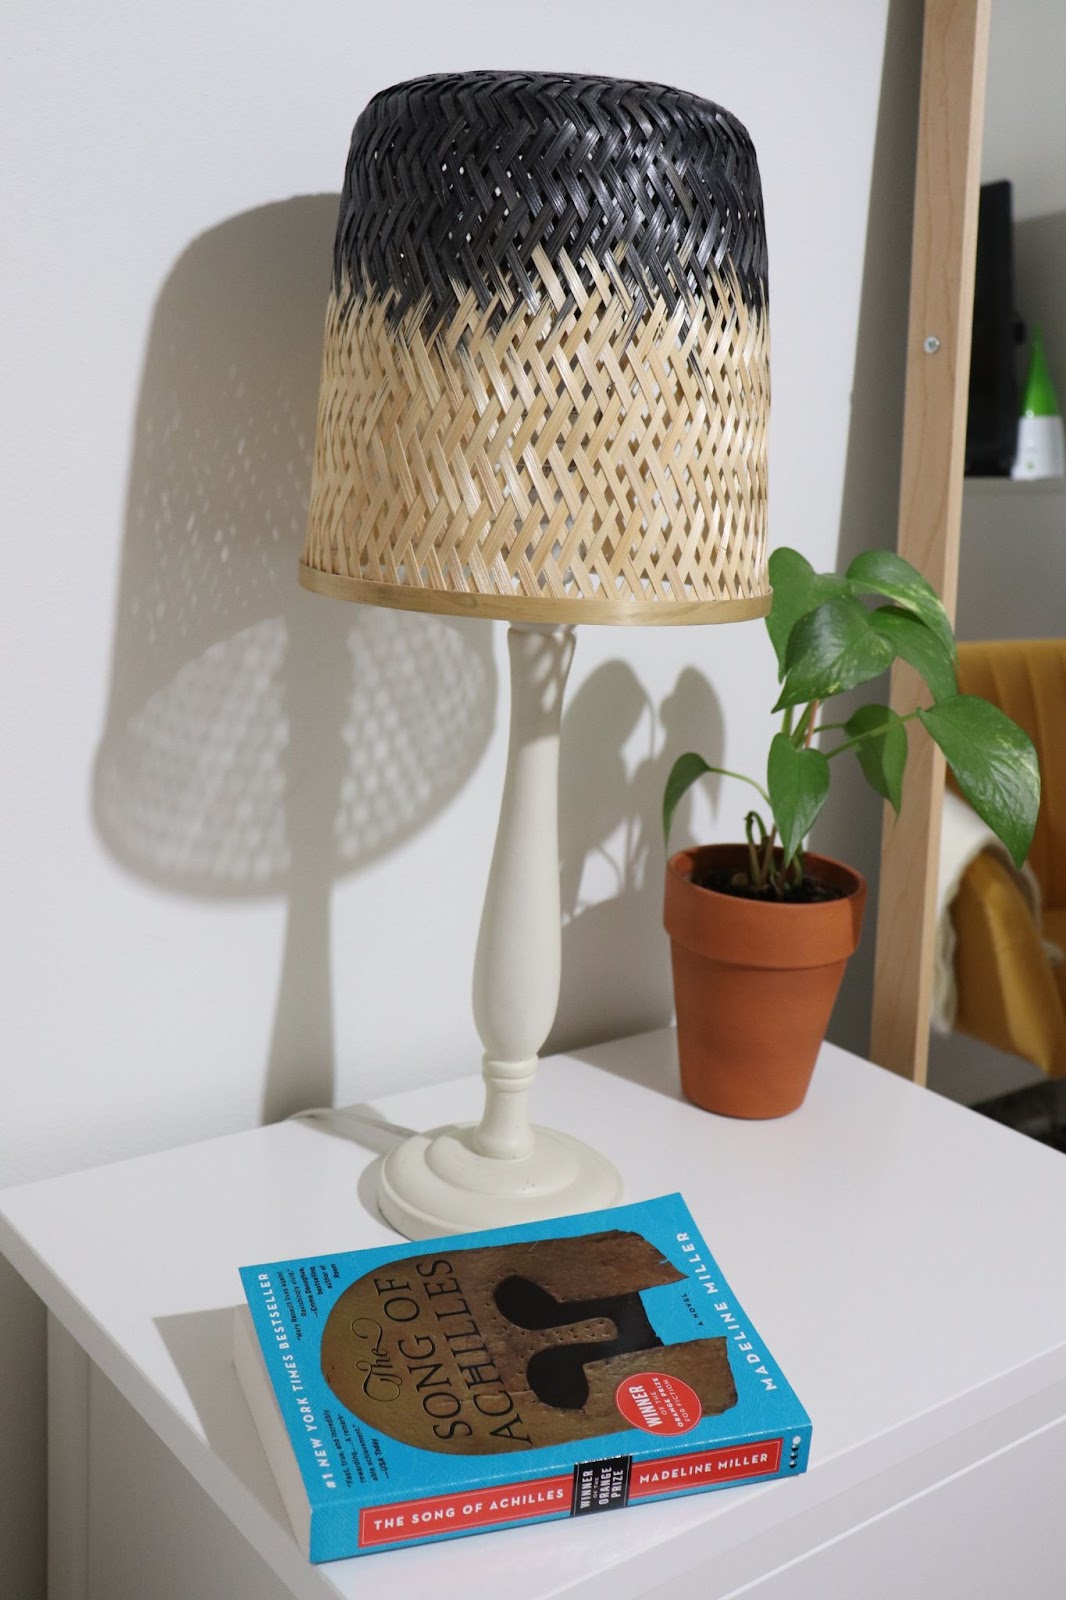
Up first was IKEA. I purchased my full-length mirror, seagrass pendant light and accompanying light cord, bamboo plant pot (which I turned into a lampshade) and faux plants all in one trip. Here’s a breakdown of the dimensions and overall prices:

Both the full-length mirror and bamboo plant pot needed some modifications to fit in my space. The mirror, as you’ll probably notice above, is meant to be standing on its own and even comes with a rack attached to the back for discreet storage. I didn’t have enough room for such clever and functional decor, so the best compromise was to install the mirror directly onto my wall. This meant discarding the rack and stand during installation, and in doing so, I was able to create the perfect full-length mirror that securely leans ever-so-slightly on the wall.
As for the bamboo pot, I used the wireframe of an old lampshade and hot glued the structure into the bottom of the planter. I then installed the pot upside down on my lamp, screwed in a bulb to keep the DIY lampshade in place and the result was a chic shade that totally matches my simple Scandinavian vibe.
The rest of my furnishings were, fortunately, much simpler to incorporate into my space. I purchased my bohemian rug from Amazon and it adds a fun pop of colour. I especially adore the white fringe which adds to the boho look. I went with the three-foot by five-foot size which fits great under my bed and cost just a little over $100.
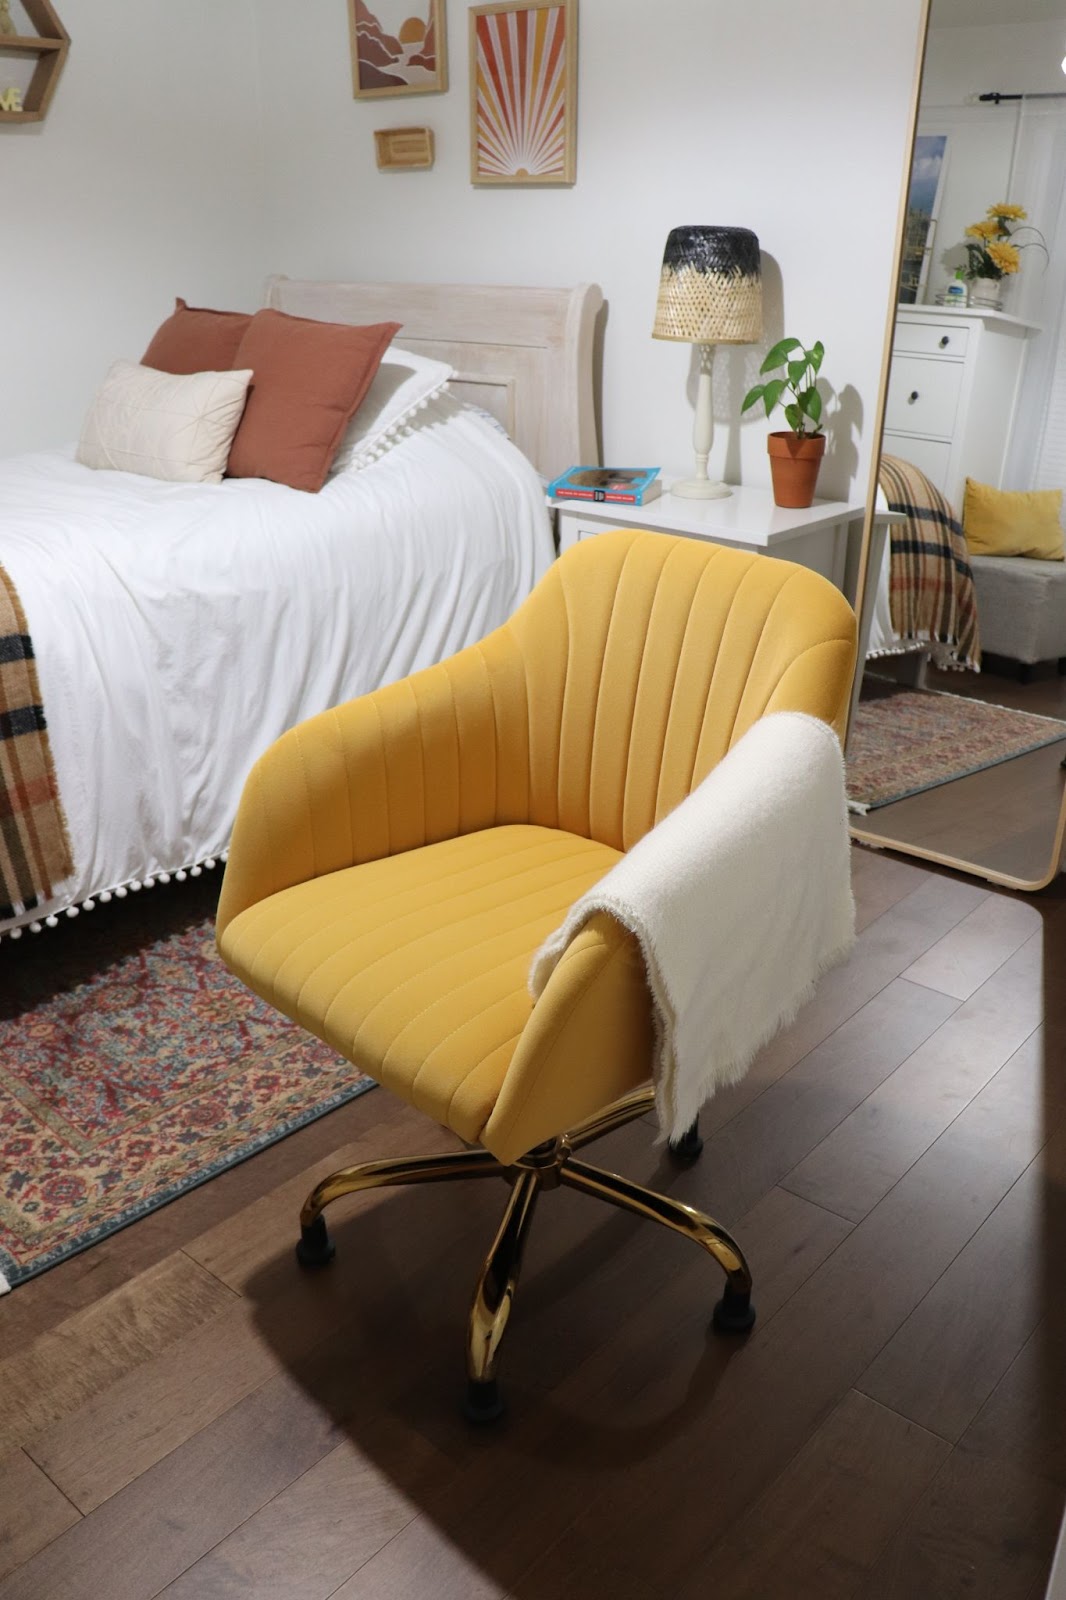
I bought my yellow mustard chair next from Wayfair. Since I kept my walls, bedding and furniture white to attain the white minimalist aesthetic, I decided to add another pop of colour—and boy does it do its job. The swivel chair was the most expensive purchase, coming in at roughly $300.
Despite being over what I had budgeted for a new office chair, I am absolutely in love with the soft velvet material and pleated detailing that make for such a pretty accent. And I certainly can’t forget the gold legs which introduce a metallic element. You may also notice that I replaced the black casters with fixed casters equipped with felt pads. This was all in an effort to prevent any floor scratching as I move my chair throughout the day while working from home.
The picture frames, baskets and various other faux plants scattered around the room and situated within my hexagon shelf which my brother custom-made for me, (yup, I’m part of a family of carpenters) were total scores I found at spontaneous trips to Winners and vary in prices, the lowest piece being $5 and the highest hitting around the $40 mark.
The end result
All in all, I couldn’t be happier with the way my bedroom turned out. I hope this overhaul gives anyone thinking of upgrading their living quarters the push to make their own changes. Trust me, a fresh coat of paint and a few new pops of colours can make a big difference—they sure did for me!
BEFORE
AFTER